Table of Contents Show
Last Words was developed as part of the Digital Arts master’s programme in Hagenberg – by Matthias Patscheider, Samantha Povolny and Bianca Zankl. Bianca is mainly responsible for programming and game design, while Samantha is responsible for both audio and graphic design. My area of responsibility covers the entire 3D area. The game is based on Unreal Engine 4.19 and can be downloaded for free from Steam. To play it, you need the HTC Vive or Oculus Rift with a room-filling play area, 360-degree localisation and motion controllers.

Preparation
The visual preparation begins with the collection of suitable references, the creation of mood boards and concept drawings (see Figure 1). PureRef is an ingenious tool for keeping an eye on references at all times. At the same time, the planning of the level design starts with very rough and simple 2D layouts. Figure 2 shows such a layout for Lisa’s room.

Based on this, the first 3D prototypes are created early on in the Unreal Engine. To create these, Unreal offers so-called geometry brushes. These allow the level layouts to be quickly moulded with basic shapes that can be used both additively and subtractively, similar to Boolean operations (Figure 3). Meanwhile, the first basic mechanics are already being implemented. The logic for our VR controller is based on the Proteus VR template. The early prototype conveys a feeling for the space, the composition and the navigation in the level. It enables an initial assessment of the scope of the project and the required assets. The resulting asset list serves as a guideline for the scope and progress of the entire project.

In order to be able to test assets immediately in the game engine, the simple blocks are replaced by rough, non-optimised meshes with automatically generated UV maps. These use the simplest shaders and repetitive, seamless textures, usually from libraries.

Figure 4 shows a comparison of this early stage with the final product. Changes can still be made without a great deal of time being required. This makes it possible to experiment and iterate with different shapes and variations in the engine.
The creation of props
As object surfaces in VR can be viewed from any proximity, we have set ourselves the goal of achieving a high texel density of 1,024 x 1,024 pixels per square metre for environments and assets and 2,048 x 2,048 for graphics and fonts. Texel Density describes the ratio of texture resolution to the surface of an object. To achieve this, we combine different shading approaches for different asset types.

For smaller objects, we create high- and low-poly meshes and then project the details. The object textures are summarised with consistent texel density on texture atlases to reduce the number of textures per level. Figure 5 shows various objects with corresponding texture atlases. To ensure consistent texel density, we use the Texel Density Checker add-on for Blender. This scales the UV coordinates according to the desired values. With Multi Object Editing in Blender 2.80, the creation of the atlases is considerably simplified compared to previous workarounds. The arrangement of the UV islands can be largely automated using the Shotpacker add-on for Blender. The arrangement (including rotation and scaling) of the UV islands can be influenced via various settings.
The various maps (including Normal, ID, AO) are beaconed in Marmoset Toolbag. This is characterised by the intuitive workflow. The baking cages are displayed visually – these are envelopes from which the beams are emitted during the baking process. Furthermore, the distances of the cages can be adjusted to suit the specific object and specifically manipulated in problem areas (e.g. fabric folds). Errors in the baking process can thus be quickly rectified without making major changes to the meshes. Similar to Substance Painter, Marmoset provides the option of defining more precisely which high-poly object is baked onto which low-poly.
The generated maps then serve as the basis for texturing in Substance Painter. The ID maps, Smart Materials and procedural masks can be used to quickly achieve a good result. Substance Painter has an optimised export preset, Unreal Engine 4 (Packed), which has been expanded for our purposes. In addition to Base Color, Occlusion Roughness Metalic, Normal and Emissive, additional, optional masks are exported for controlling various shader effects, e.g. for the glow of interactive objects or areas with random colours. Both effects are used in the colour cans in an early level, see Figure 6.

Master material
Almost all materials of the individual props can be derived from a few common master materials. Changes are automatically passed on to all material instances. The respective master material defines the available parameters. It is very easy to create such a master material in the Material Editor. There are countless examples and tutorials online. The master material is structured in such a way that the parameters for activating and deactivating shading features are located at the beginning. In the Material Editor, these are implemented via static switches. Features that are not active are not compiled and therefore do not require any resources, but cannot be changed at runtime.
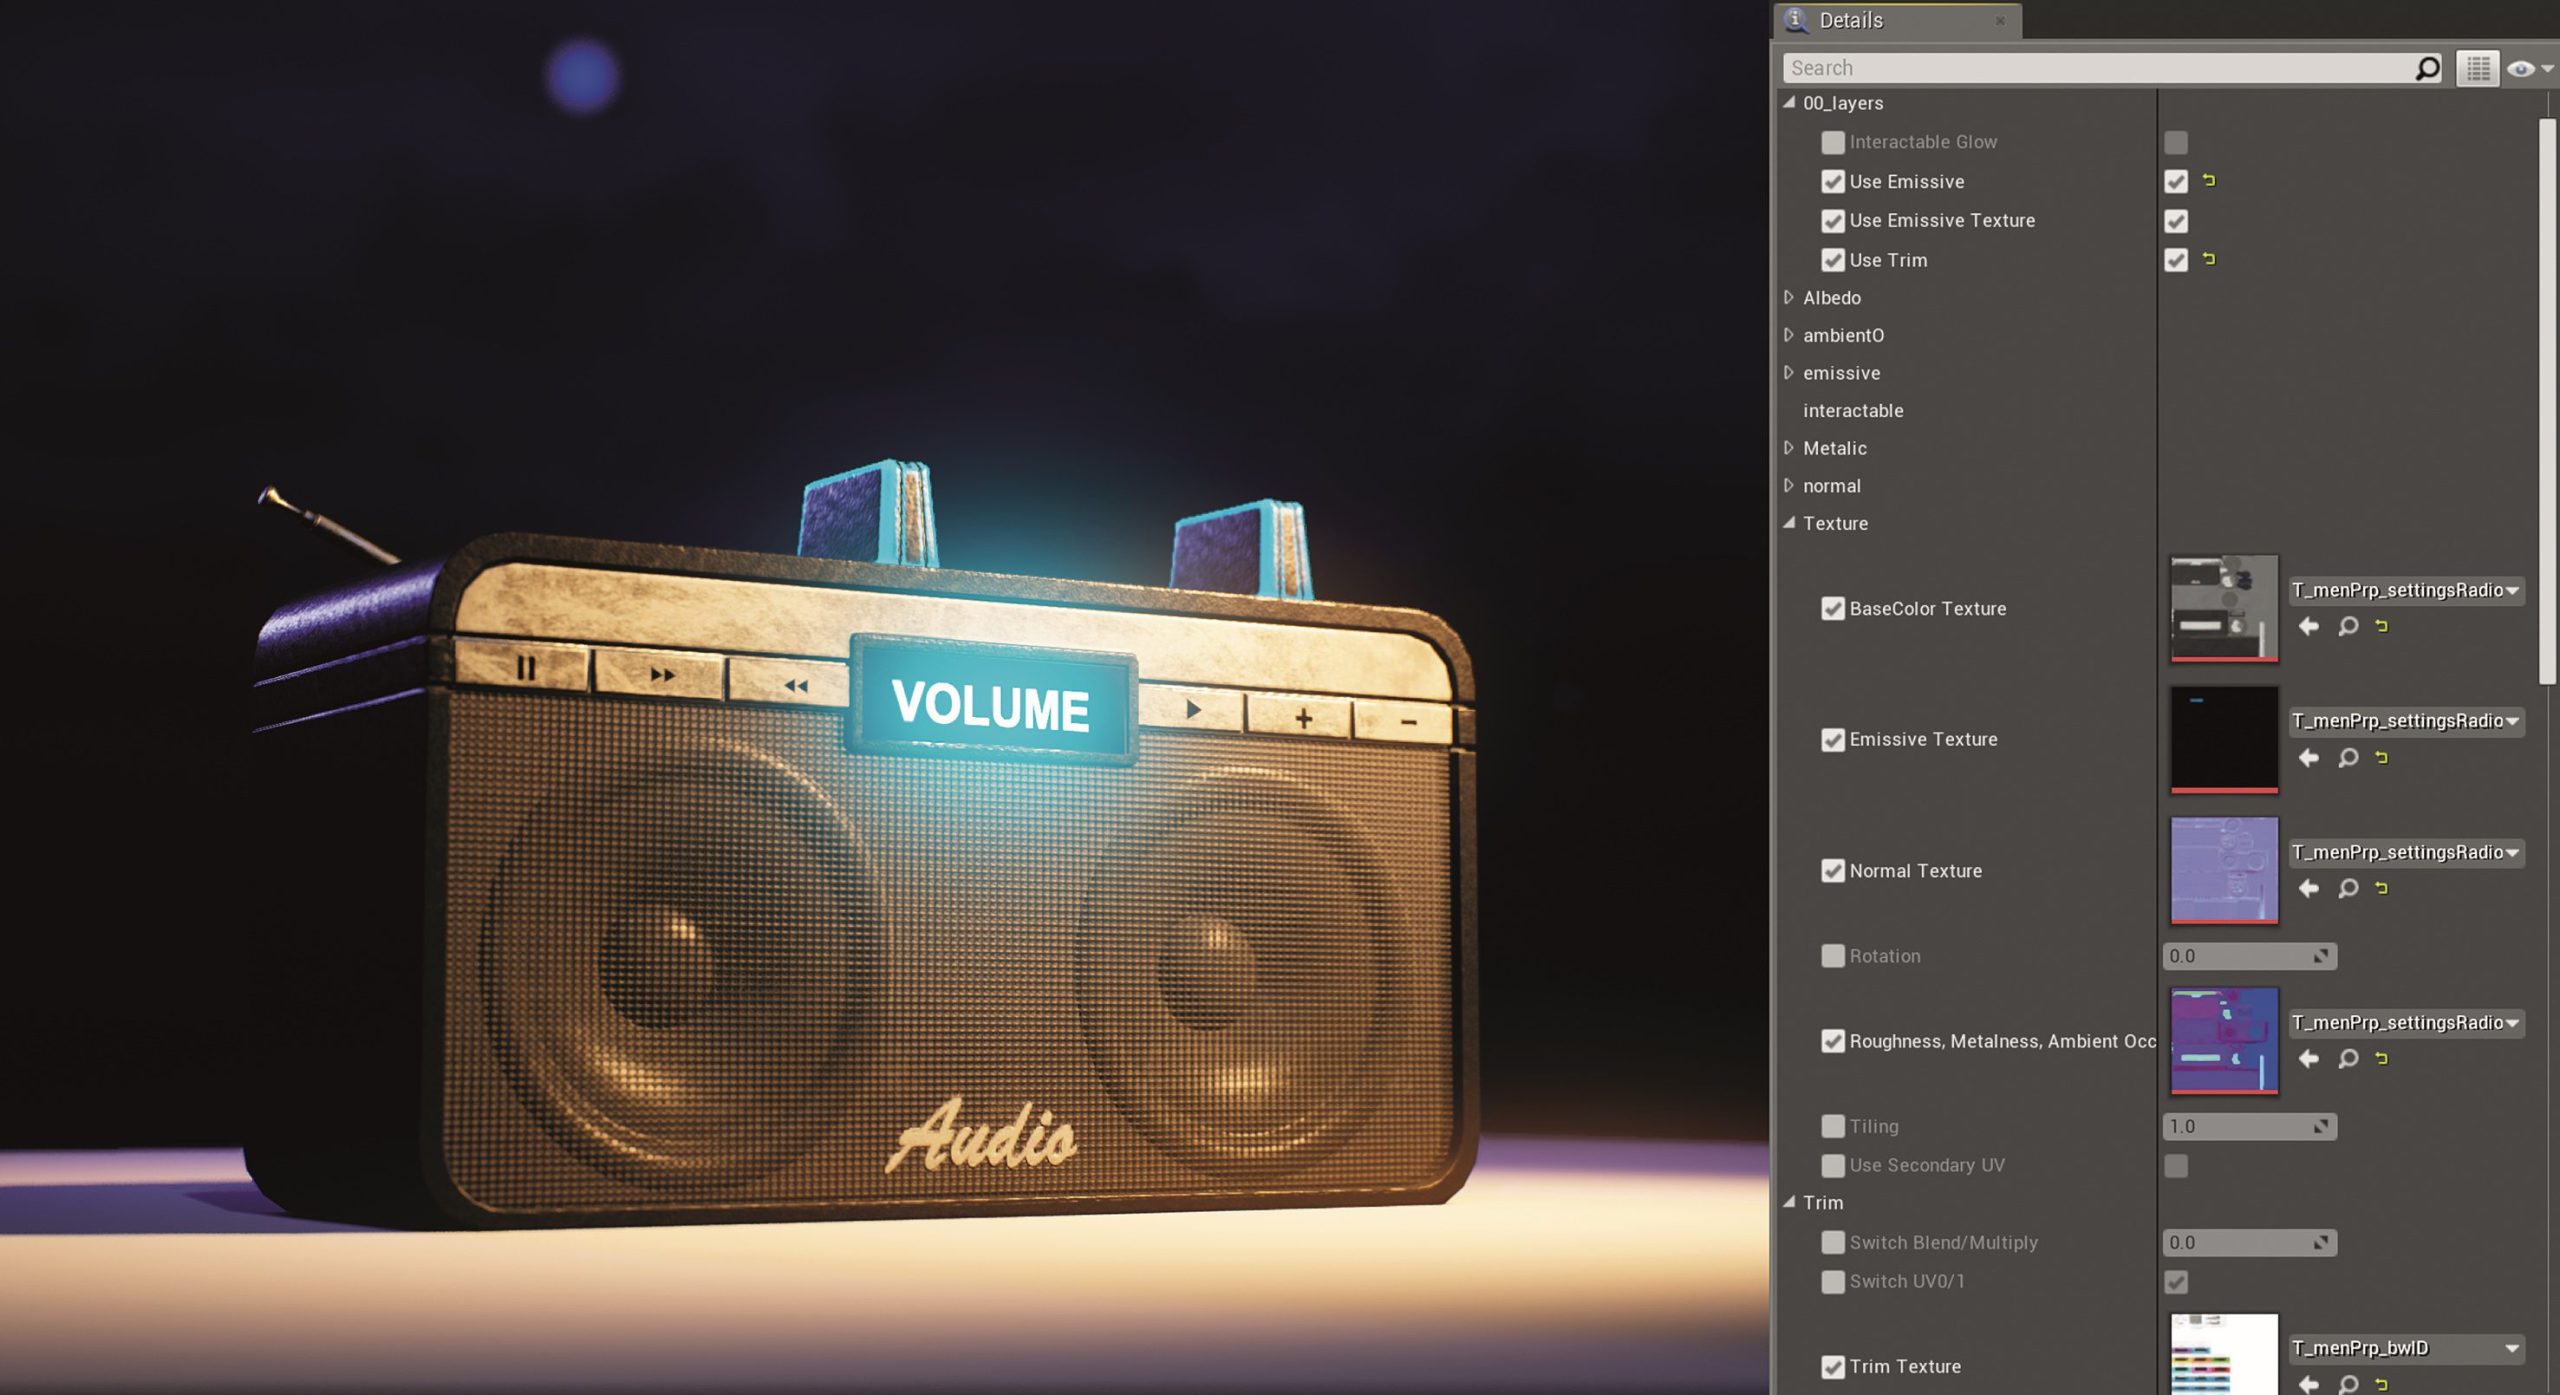
This is followed by the dynamic parameters. These define the material textures, colour overlays and the manipulation of the UV coordinates (including tiling and offset of the textures), roughness and ambient occlusion values, see Figure 7.
Layered Materials
Many of the larger assets such as furniture and walls are damaged using material layering. Masks define the area of effect of the individual base materials. No high-poly meshes are created for these assets. The object textures are generated in Substance Painter directly from the low-poly mesh and, with the exception of the ambient occlusion map, are only used to create the masks. When exporting, the masks are saved in the RGB channels and the ambient occlusion map in the alpha channel (Figure 8).

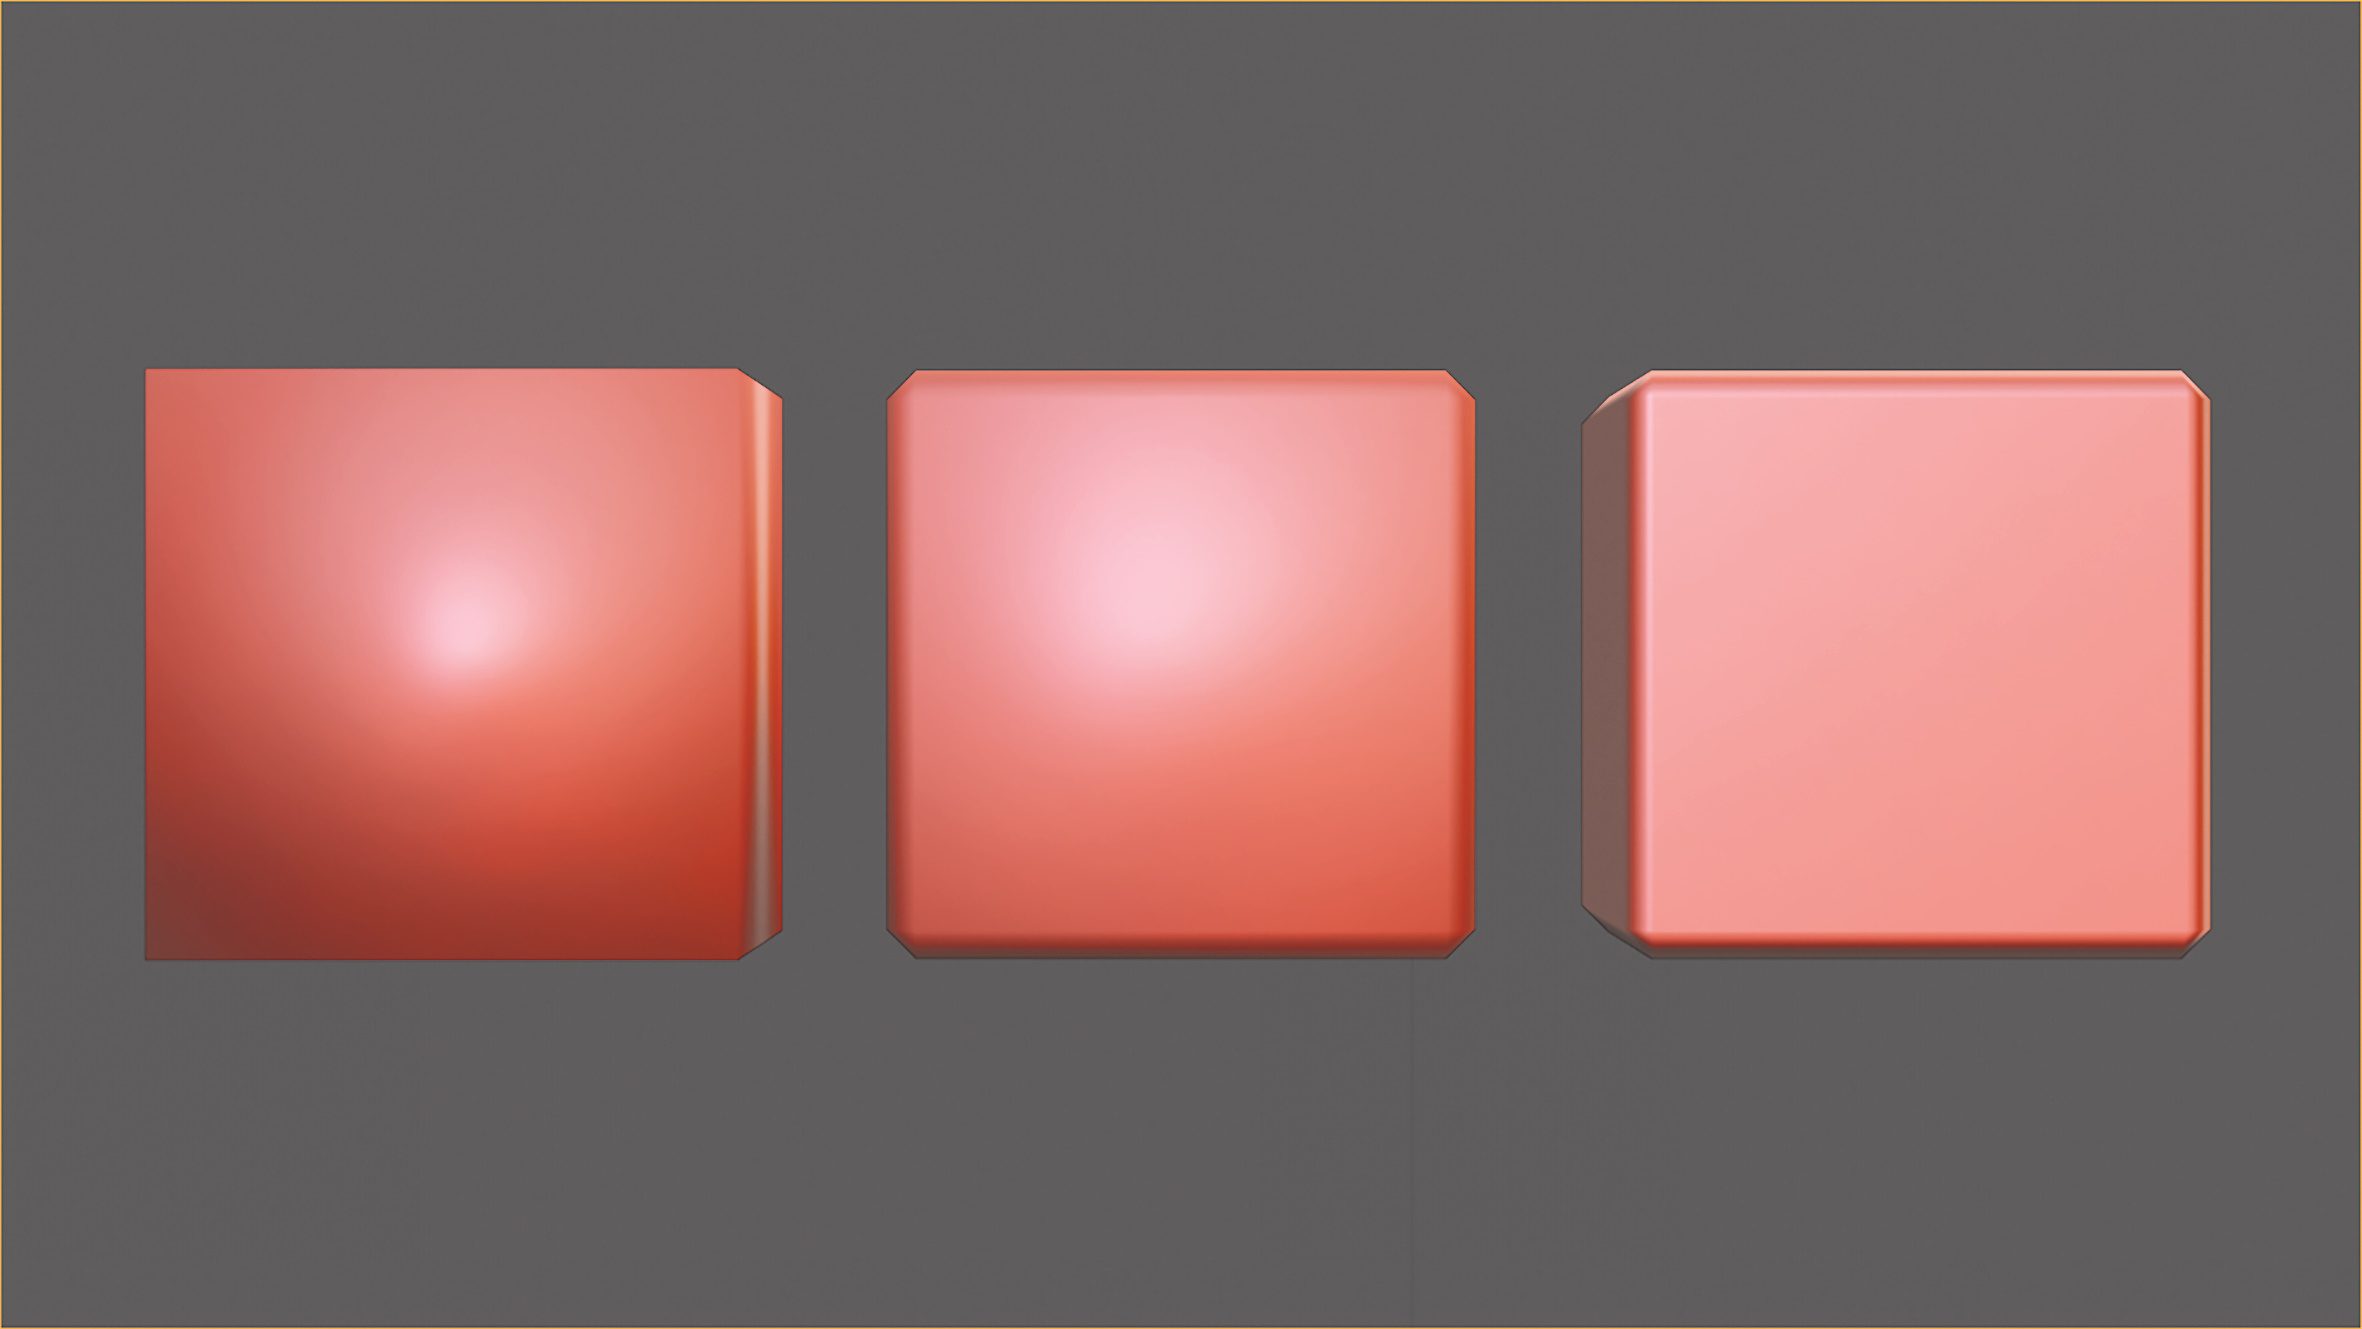
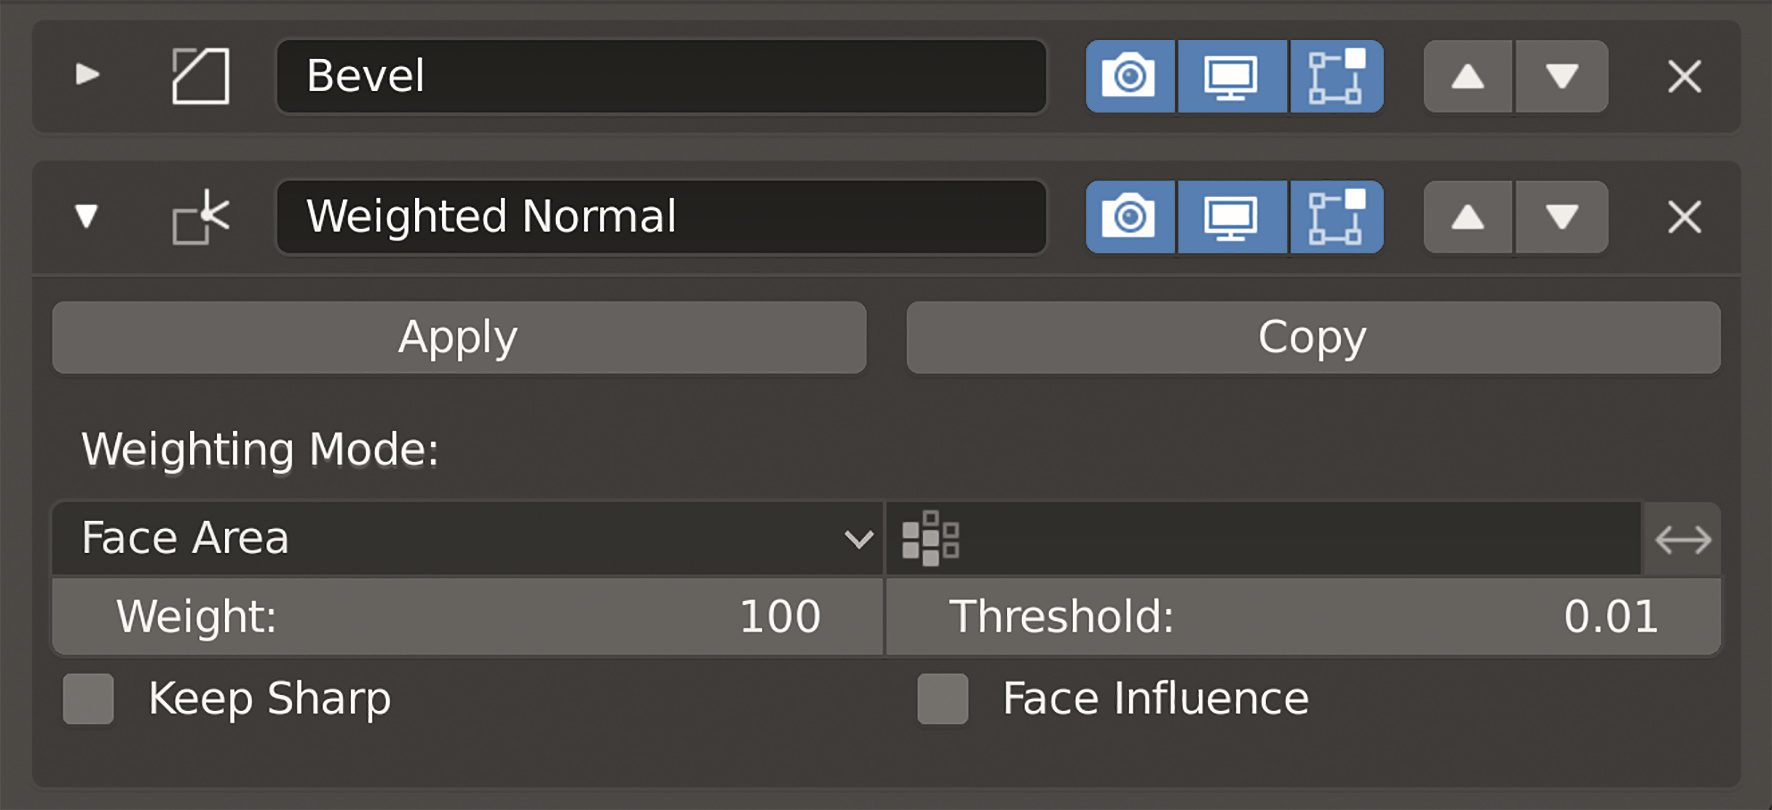
Instead of the generated normal maps, the edges are given a simple bevel. In combination with face-weighted normals, this ensures the correct shading, even without additional support loops. In Blender 2.80, this can be easily achieved using the Weighted Normal Modifier (Figures 9 and 10).
Finally, the base materials of the layered material provide the necessary surface details. Hinges and door handles do not use material layering, but the same shading approach as props.
The big advantage is that any number of objects can be shaded using the same base materials (Figure 11). All these objects use the same seamless textures and do not require unique 4K textures. The base materials can be easily iterated and exchanged. The resolution of the masks in this case is only 512 x 512 pixels common to all these objects. The resolution of the seamless base materials is between 256 and 1,024 pixels.

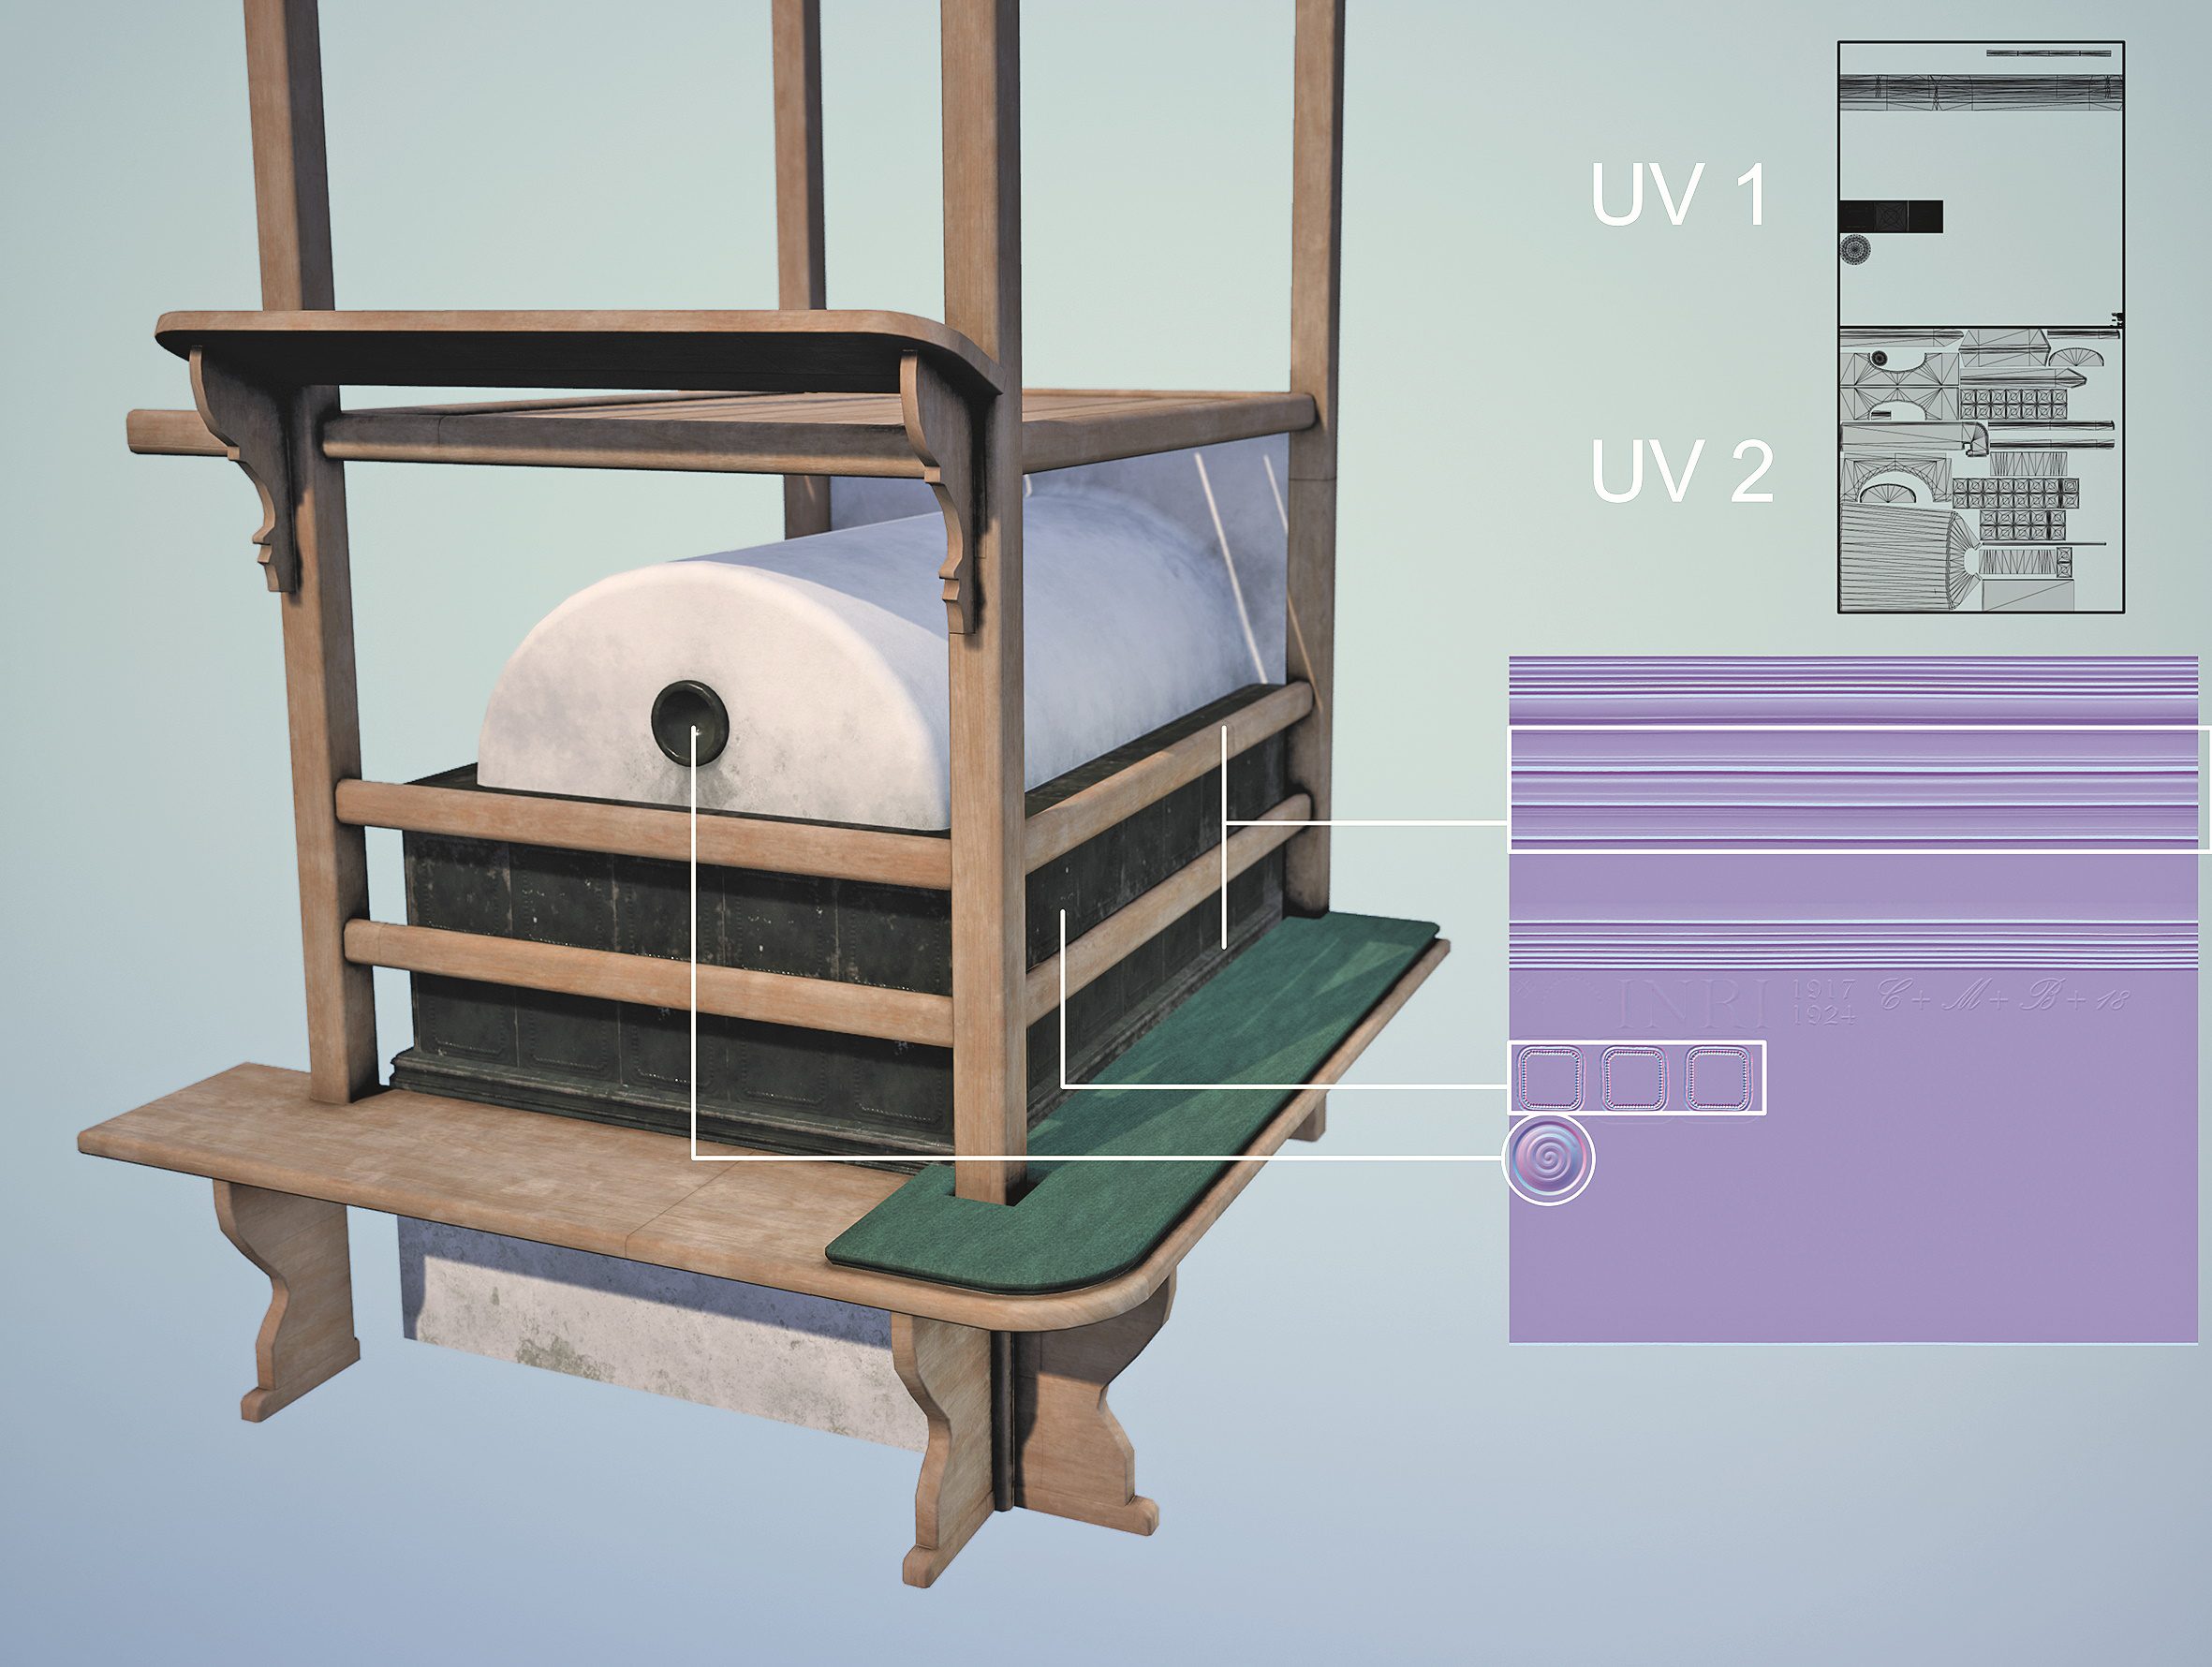
For doors, windows and furniture, the layered material is extended by the option of using a trim sheet with an additional UV set. The trim sheet contains reusable texture areas that can be projected onto any part of the mesh using UV coordinates. With these trim sheets, it is possible to project certain normal map details onto different objects, such as the tiles and moulding details on the tiled stove in Figure 12.
In addition to textures, vertex painting is also used to mask the base materials in the outdoor areas. The entire outdoor scene is primarily made up of five base materials.
By using vertex painting, for example, paths can be drawn and customised directly in the engine. In combination with the Node Height Lerp material, complex and detailed transitions can be created between the base materials, even with a low polygon count (Figure 13).

The topic is further developed in the master’s thesis “Defining Design Patterns for Pattern Based Material Layering in Real-Time Engines”. This can be found on my Github channel.
Special materials
For specific shading requirements, a new material is created that is not derived from the master material in order to maintain its clarity. In a later scene, a black, sticky substance unexpectedly spreads over the torn elements of a child’s drawing. This causes previously invisible scribbles to light up (Figure 14).

The spread is controlled via a material parameter in the blueprint. Blueprints are the visual scripting environment in UE4. Figure 15 shows the influence of this parameter. The animation is generated via various moving noises and the manipulation of UV coordinates. The effect is performant and the underlying principles are simple, but the visual impression is great.

Fabric and vegetation
Vegetation and fabrics give the scene that certain something. The Marvelous Designer makes it easy to create cushions, blankets and the like. In combination with Unreal’s Cloth Shader, they contribute greatly to the quality of an environment (Figure 16).
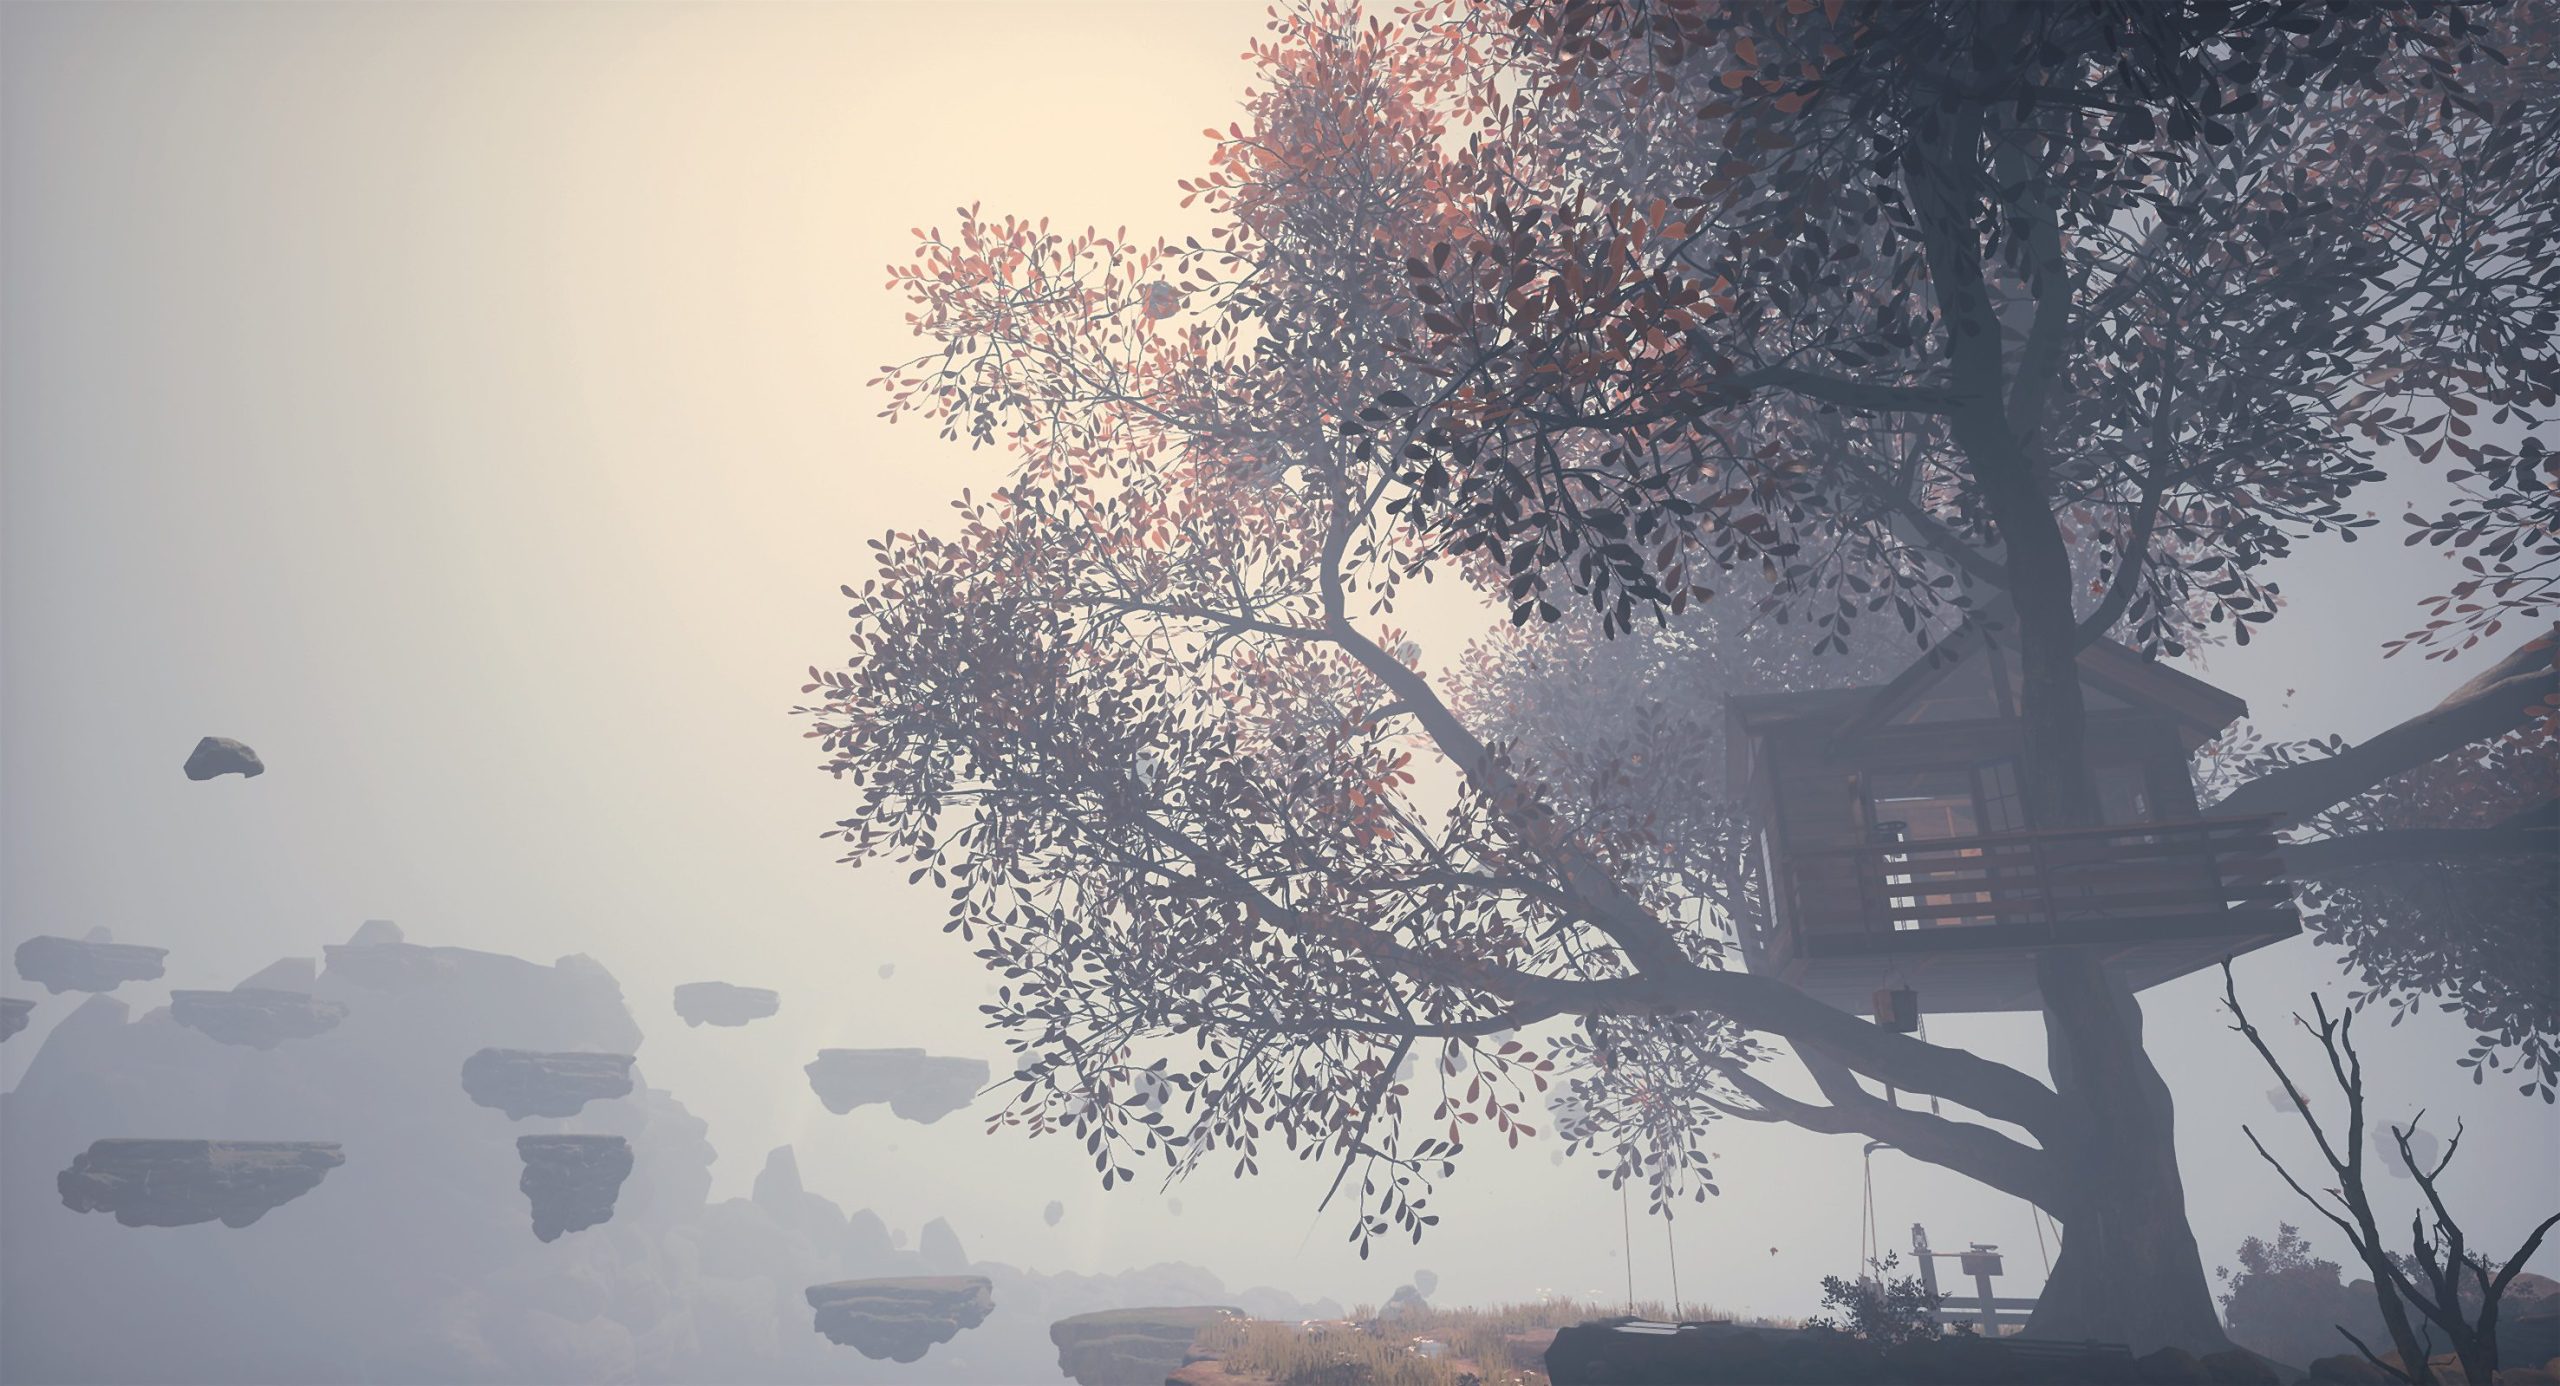
Creating complex sections can be challenging. It is important to understand what a real pattern should look like in order to be able to reproduce this in Marvelous Designer. Speedtree was used for the first time for this project. The node-based creation of vegetation is user-friendly, the assets are optimised for the game engine and wind animations can be imported as part of the shader. The challenge in “Last Words” was to make a tree grow through an existing treehouse mesh (Figure 18). This was achieved thanks to the possibility of importing meshes and using them as forces, manually drawing splines for branches and subsequently manipulating already generated areas.

Organisation
Keeping an overview is a huge challenge for me. The project comprises several hundred assets, which use different shading types and materials, are summarised on texture atlases and use additional UV sets for graphics, fonts and trim sheets.
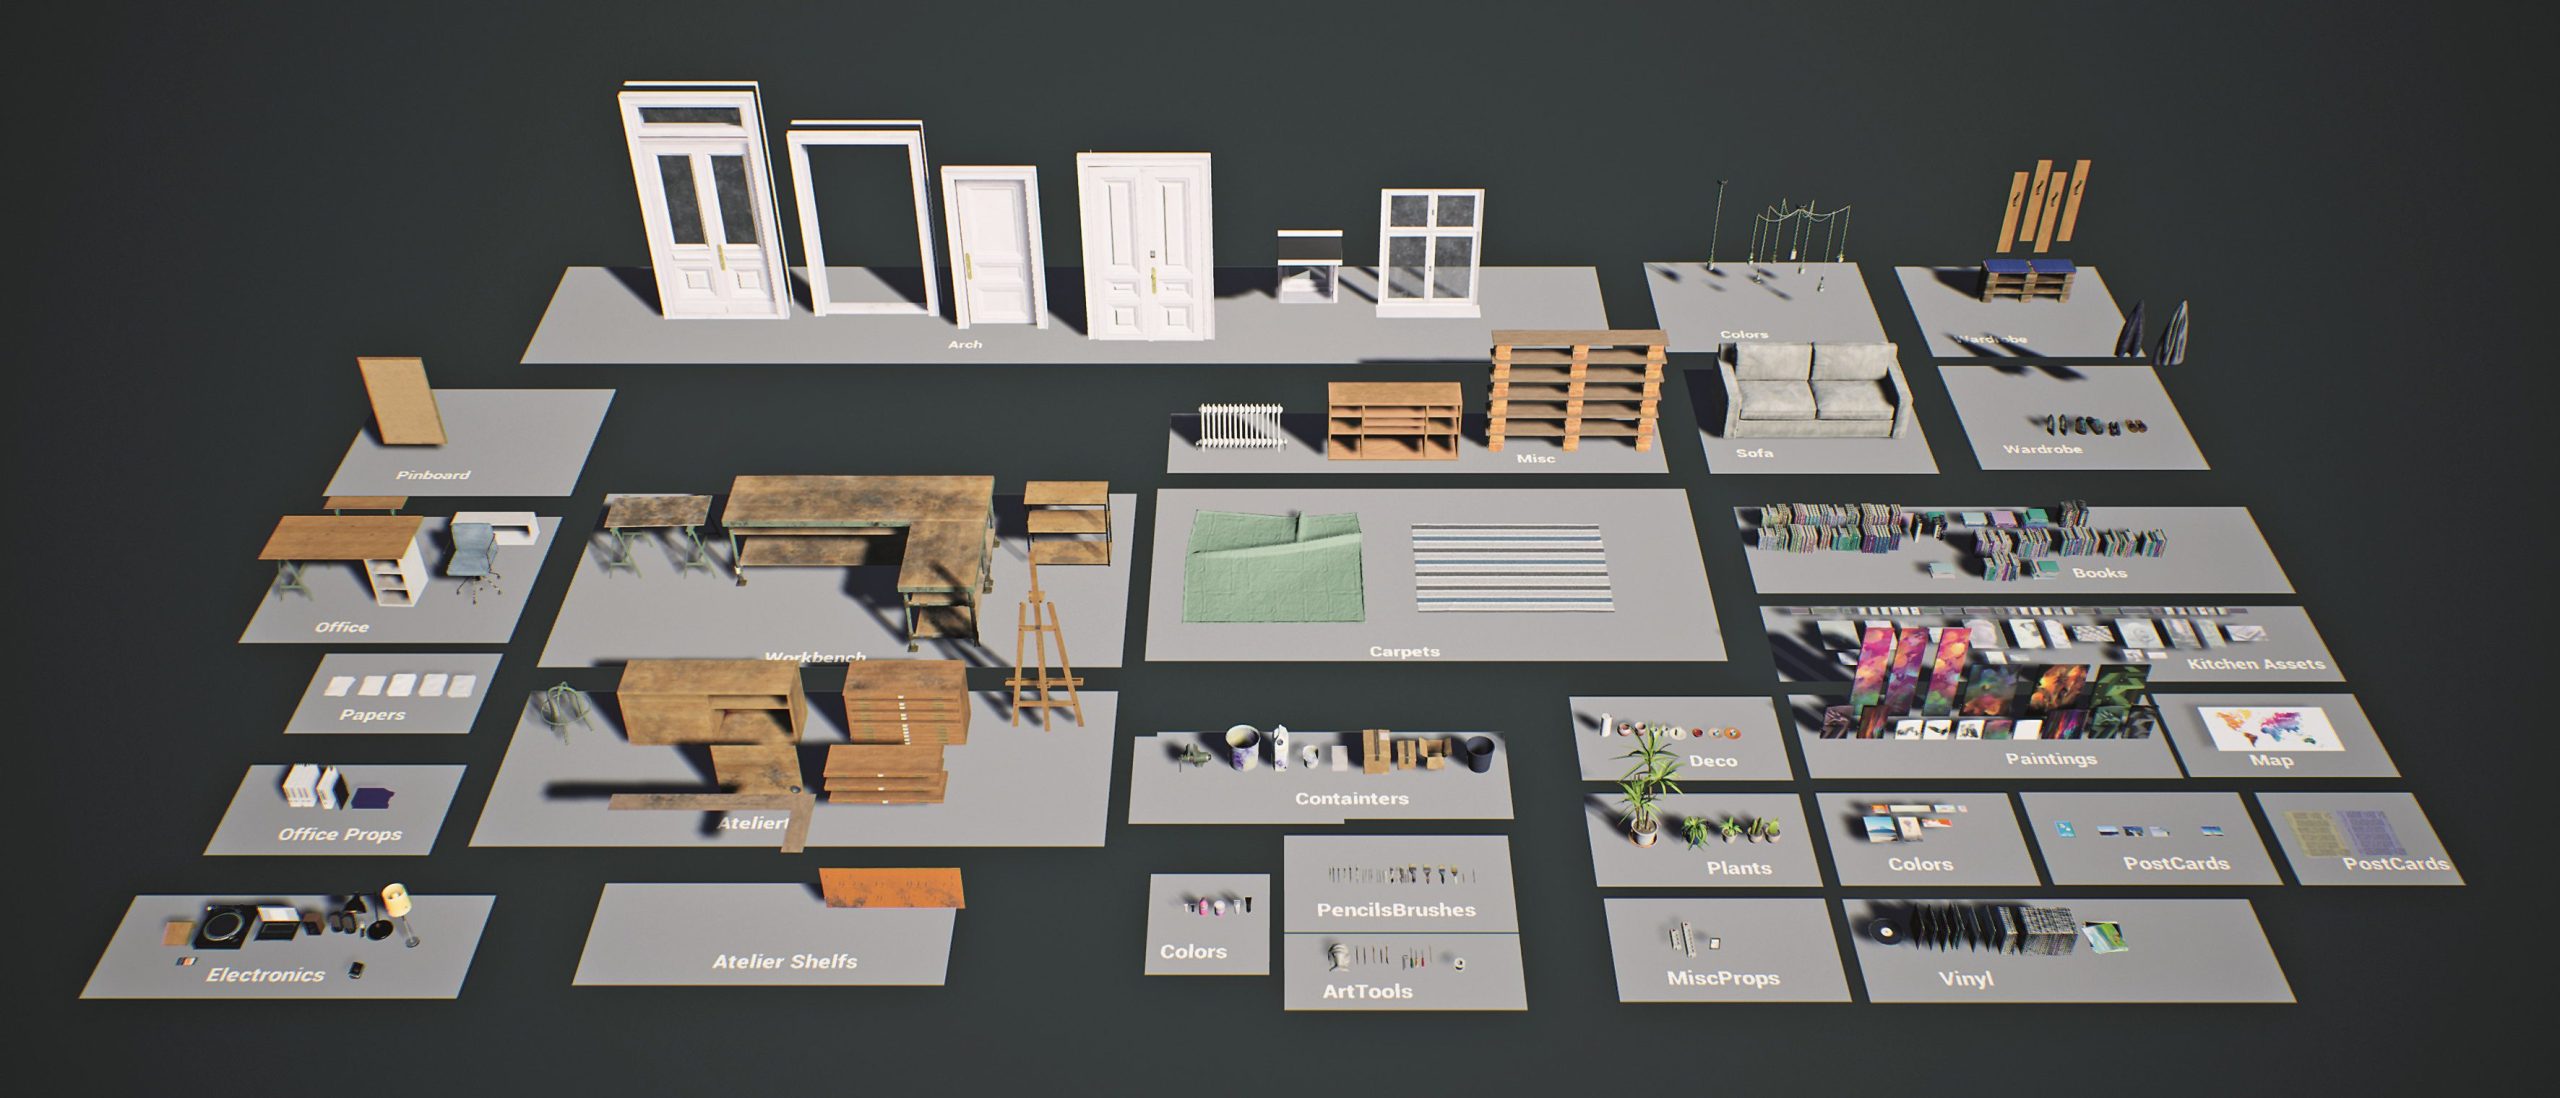
In the Unreal Engine, we collect the assets in so-called master levels (Figure 19). Together with the asset list, this list makes it easier to maintain an overview. It is easy to see how far the assets in a level have progressed. This neutral setup makes it easier to evaluate objects, materials, textures and technical aspects such as colliders, LODs and light maps. We only use Unreal’s internal LOD system. Furthermore, adjustments can be made to the assets without provoking any conflicts in the game levels.
Lighting
The main light source (usually directional light) and the sky light serve as the basis for the lighting setup. The lighting is further elaborated by setting additional point and spot lights. When setting up the lighting, the following values should be deactivated in the Post Processing Volume: Auto Exposure, SSAO, SSR, Vignette and Bloom. Auto Exposure in particular makes lighting much more difficult due to the dynamic adjustment of brightness. The accessible areas are enclosed by a Light Mass Importance Volume. The light is calculated with a higher quality in this volume. If possible, the lights should be set to static. If, for example, there are several spotlights on the ceiling of a room, these can be set to static and a stationary light can be added. While the static lights provide high-quality and global lighting, the latter is responsible for the lighting and shadows of the dynamic objects. These simple tricks give the impression of realistic lighting with improved performance.
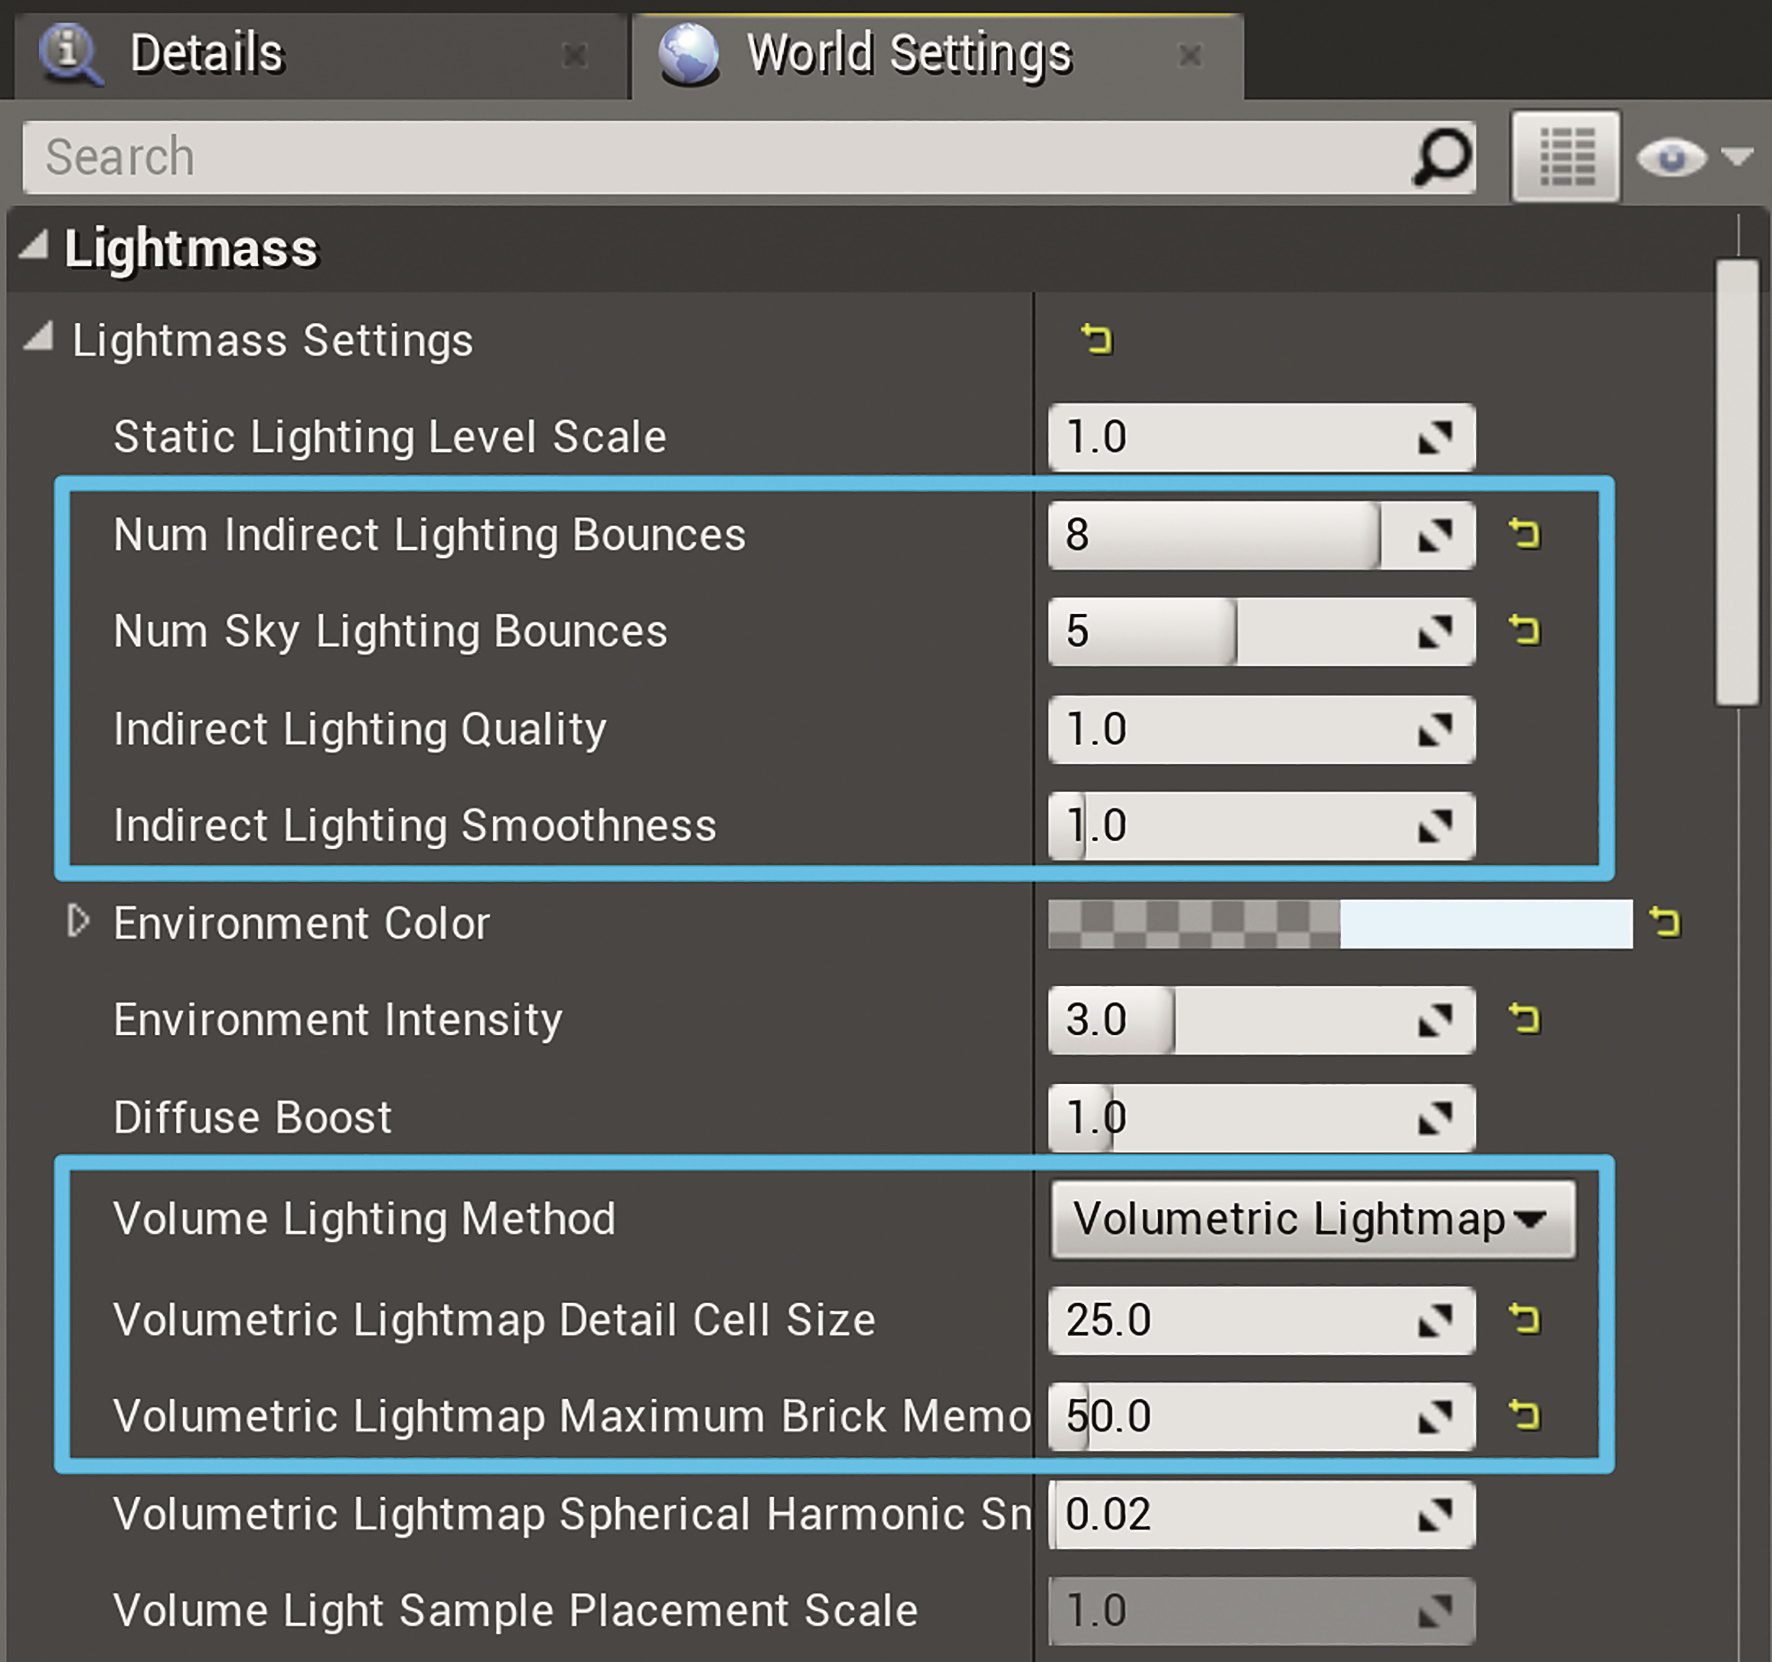
Static lights must first be calculated. This process only takes a short time in preview mode and already gives a first impression of the final result. Based on this, further adjustments can be made. If the interim result is satisfactory, the scene can be calculated in a higher quality level. The effects of global lighting and details can now be seen more clearly. In addition to these quality levels, the World Settings contain further quality settings such as the quality and number of indirect bounces and the resolution of the volumetric light map (Figure 20).
Adjusting static and dynamic lighting is a challenge. Interactive objects stand out brightly even in dark corners, while others appear too dark. To minimise light bleeding through walls, additional thick boxes can be added to shield the external lighting. Using a room-filling, stationary point light in combination with a significantly increased resolution of the volumetric light map can further minimise this problem. Experimenting with the radii and intensity of the various stationary lights can also significantly improve the quality of the dynamic lighting.
Effects
After lighting, the previously deactivated post-processing effects can be reactivated and the values in them adjusted. In VR, the effects must be calculated for both eyes and therefore require more computing power than in desktop applications
Desktop applications. The considered use of colour grading and post effects further enhances the final result (Figure 22).
Finally, the scene can be refined through the use of various effects. In VR, effects such as Light Shafts, Atmospheric Fog and Volumetric Fog are not recommended in our own experience, as the effects on performance are serious. Similar effects can also be achieved using other tricks, such as particle systems, special materials and light functions. Epic has provided some sample projects. There you will find a variety of examples, including dust, particle systems, vapour, fake lens flares and godrays. These effects can be used and customised for your own projects.
Conclusion
Following the release in February, we have published an update with improved performance and graphics. This largely concludes the project for us and we are now turning our attention to new challenges.
Before this project, none of our team had ever worked with the Unreal Engine or virtual reality. We had to acquire this knowledge over the course of the project. In many areas, we saw the project as an opportunity to break new ground.
The initially conceived shaders and workflows turned out to be much more complex than initially planned. This complexity sometimes blocked the creative process and the ability to iterate quickly. Over the course of the project, we were able to improve this and achieve identical results more easily. A good example is the aforementioned organisation of assets, where a complex asset system was largely replaced by well-structured 3D files, naming conventions and a few usability scripts.
We had similar experiences with performance. At the beginning, we got caught up in the little things and optimised aspects that were not the actual problem. On several occasions, an ill-considered asset turned out to be the source of the performance losses. Once the actual problem had been eliminated, the optimisations made beforehand were of little or no consequence.
Probably the biggest challenge, however, was to convey the story we had devised to the player in an understandable way using environments and Lisa’s voice alone. The playtests helped us a lot here, as we added or removed hints by asking the test subjects
have added or removed.


